When learning how to set fence posts correctly, you need to make sure you understand how to preserve the posts. Prior to installation, soak the bottom of the posts in a wood preservative containing copper napthanate, such as Cuprinol.
Note: Available at some paint stores and home centers, this wood treatment is specifically designed for in-ground applications.
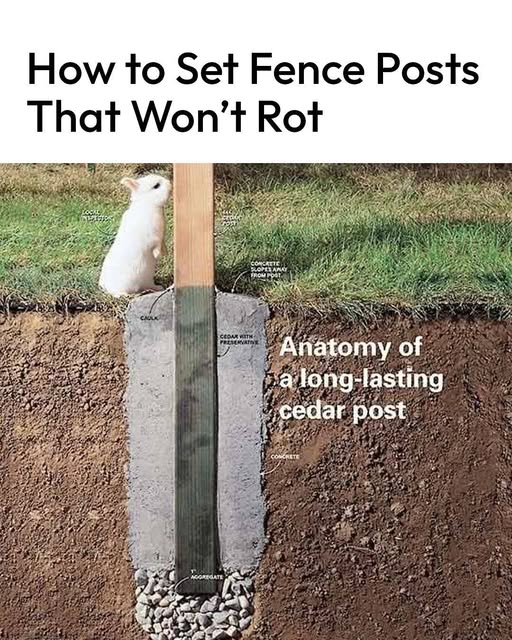
Insert Aggregate
Once you’ve dug your hole, place about 6 inches of aggregate in the bottom of the posthole to allow for drainage. This will minimize the amount of water that comes into contact with your cedar fence post.
Pro Tip: The bottom of the post should extend a few inches into the aggregate as shown.
Pour in Concrete
After you’ve got your aggregate in, it’s time to pour in the concrete.
Concrete should be 2-3 inches above the soil level. This gives you the ability to shape the concrete around the fence post base a bit.
Trowel the top smooth and slope it so that water runs away from the post. You don’t want water to have an opportunity to pool around the base of the fence post, or else you’ll be right back where you started.
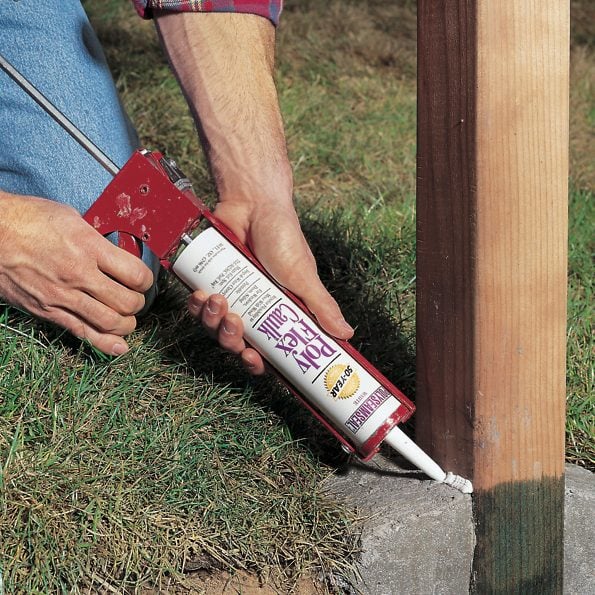
Caulk Around the Fence Post Base
The final key to fence post installation is to seal the base with caulk. Apply high-quality exterior acrylic latex caulk, or silicone specifically designed to adhere to concrete, at the base of the post. Find out if it is okay to use expanding foam for setting fence posts.
Note: This will seal the gap between the concrete and post that’s caused by freeze/thaw cycles.