
How Can I Get The Perfect Sliceable Consistency?
The key to nailing that lush yet stable texture is in the whipped cream. Whip the heavy cream until it forms very stiff peaks with an airy, spreadable texture. This light and lofty whipped cream gives structure to the filling when folded together.
Using blocks of full-fat cream cheese instead of tubs also lends stability, tang, and richness. And be sure not to skip the long chill time to allow the filling to completely firm up. Follow those tips and slicing beautiful wedges will be a breeze!
What Tips Help Streamline Prep?
I highly recommend using a springform pan here. Not only does the removable sides make serving a cinch, but you can also press the Oreo crust up the sides for a pretty presentation. Chilling that crust first gives it a headstart on firming up too.
When melting chocolate, use 50% microwave power to prevent scorching. Check and stir every 30 seconds until smooth. And don’t forget to give yourself a few hours for the pie to chill and set – resisting sampling can be hard, but patience pays off in perfect slices!
How Should I Store Any Leftover Pie?
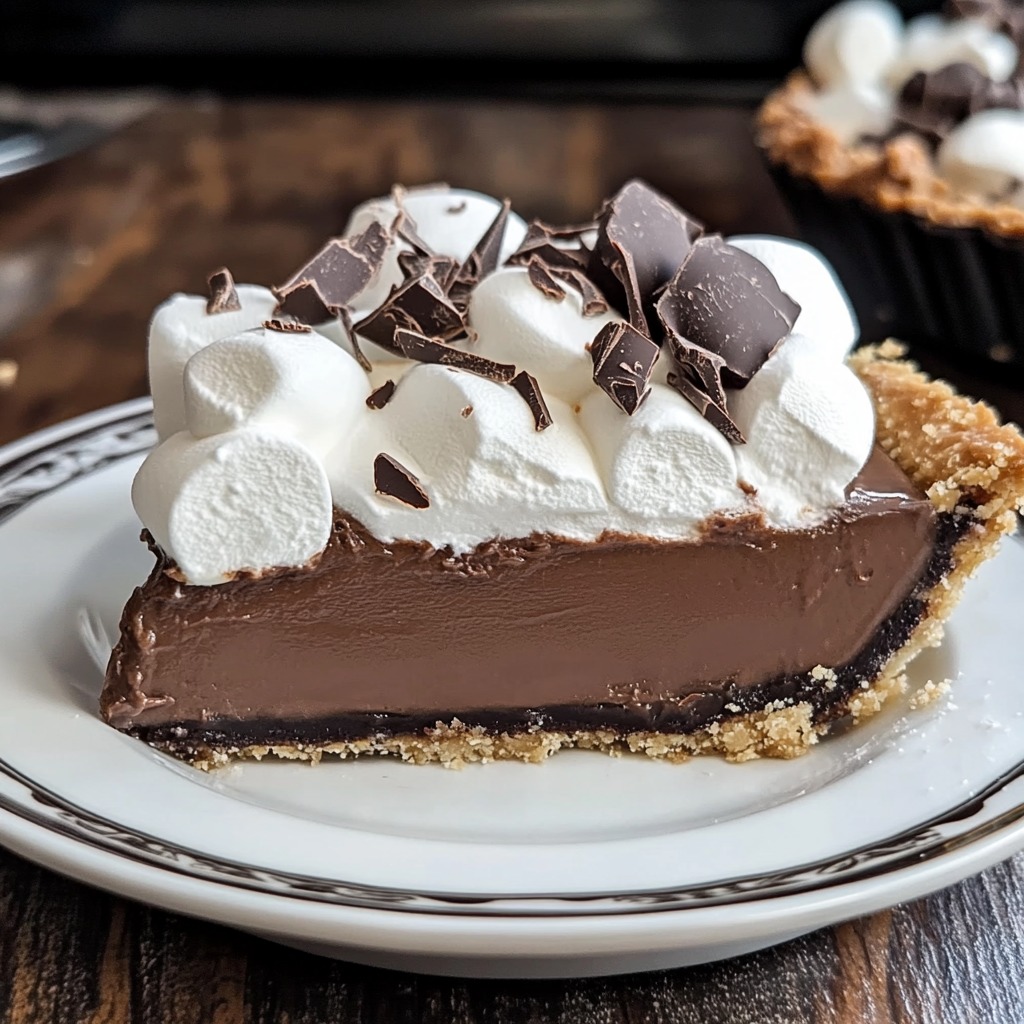
You likely won’t have to worry about leftovers with this vanishingly rich dessert! But if you do, it stores nicely covered in the fridge for 2-3 days. The crust retains its crunchy texture while the silky filling holds beautifully.
If making more than a day ahead, assemble the pie but wait to add the sweet whipped cream topping right before serving. A fresh fluffy layer of sweet cream takes this treat over the top!
So now there’s no excuse not to dive into this easy yet elegant pie on your dessert table! In no time at all, you can be enjoying chocolate marshmallow decadence.
No-Bake Chocolate Marshmallow Pie Recipe
Ingredients:
Crust Components:
- Oreos, 1 package (14oz) – keep 2 aside for garnishing
- Unsalted butter, 1/2 cup, melted
Mousse Filling:
- Dark chocolate bars (your choice), Two 4 ounces (113g each)
- Heavy whipping cream (cold), 1 cup (236ml)
- Cocoa powder, 3 tablespoons (15g)
- Full-fat cream cheese (room temperature), 8 ounces (226g)
- Granulated sugar, 2 tablespoons (24g)
- Jet-Puffed Marshmallow Crème, 1 jar (7oz)
Whipped Cream Topping:
- Heavy whipping cream, 1 cup (236ml)
- Powdered sugar, 1/2 cup (65g)
- Optional: Hot fudge sauce for drizzling
- Optional: 2 crushed Oreos for garnish
Preparation Steps:
Crust Assembly:
- Lightly grease a 9-inch springform pan with cooking spray, then wipe with a paper towel. Line with parchment paper.
- Finely crush Oreos (using a food processor or blender).
- Combine melted butter with crushed cookies until well mixed.
- Press mixture firmly into the pan’s bottom and sides. Chill while preparing the filling.
Mousse Filling:
- Break one chocolate bar into pieces; melt in microwave (60-90 seconds), stirring until smooth.
- In a chilled metal bowl, beat cold whipping cream to stiff peaks. Gradually add cocoa powder; continue beating.
- In a separate bowl, blend cream cheese and sugar until smooth. Add melted chocolate, then marshmallow crème. Mix well.
- Fold whipped cream into cream cheese mixture.
- Chop the second chocolate bar; fold into filling.
- Pour filling over crust. Refrigerate 3-4 hours.
Whipped Cream Topping:
- Beat heavy whipping cream in a chilled bowl to soft peaks. Gradually add powdered sugar; beat to stiff peaks.
- Spread or pipe onto chilled pie. Garnish with crushed Oreos and hot fudge sauce (optional).
Storage Note: Keep pie covered in the refrigerator for 2-3 days for optimal freshness.
Enjoy this blissful, no-bake delight that’s perfect for any occasion!
