

Directions:
-
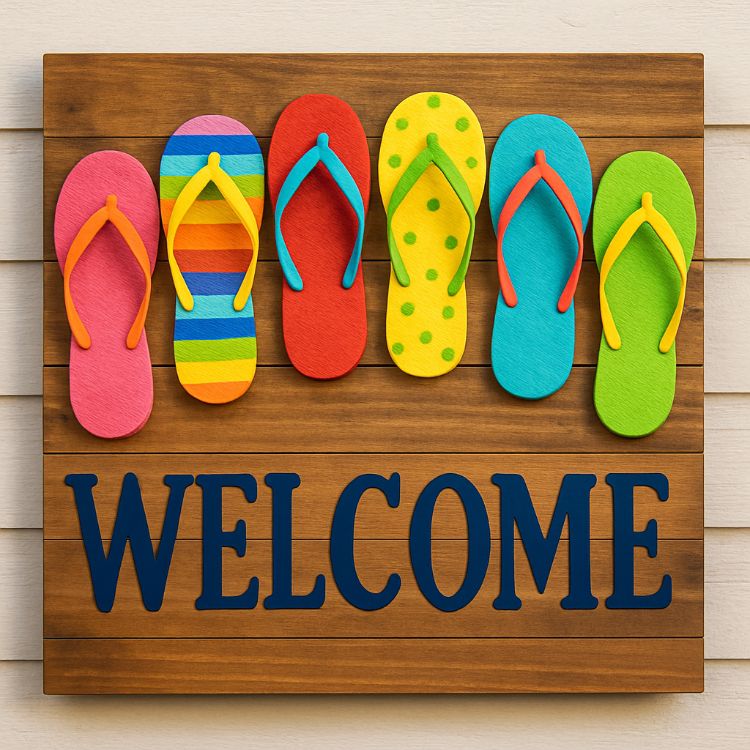
Prepare your wooden board. If you want, paint it and let it dry completely.
-
Arrange the flip flops on the board in a pattern you like — alternate colors or create a rainbow effect.
-
Once happy with the layout, glue each flip flop securely to the board using strong adhesive or a hot glue gun.
-
Use letter stencils or stickers to spell out “Welcome” on the board. Place the letters above, below, or around the flip flops as you prefer.
-
(Optional) Apply a clear sealant over the entire sign to protect it from weather if you plan to hang it outdoors.
-
Let the glue and sealant dry completely before hanging your new cheerful welcome sign on your porch.
Variations & Tips
-
Personalize your sign by using flip flops in different sizes or fun patterns like polka dots or stripes.
-
Add embellishments such as small seashells, starfish, or faux flowers to enhance the beachy feel.
-
For a rustic look, try a distressed wooden board paired with neutral-colored flip flops.
-
Paint each flip flop with family members’ names or initials for a unique, personalized touch.
This project is wonderfully adaptable, letting you express creativity and perfectly complement your home’s décor.
