4. Chill the Mixture
This step is crucial for both flavor development and churning success.
- Strain the custard through a fine-mesh sieve into a clean bowl to remove any bits of cooked egg.
- Cover and refrigerate for at least 4 hours, preferably overnight.
🧊 Chill Tip: A well-chilled base leads to smoother ice cream with fewer ice crystals.
5. Churn the Ice Cream
Time for the fun part!
- Pour the cold mixture into your ice cream maker.
- Churn according to the manufacturer’s instructions—typically 20 to 25 minutes.
You’ll know it’s ready when it reaches a soft-serve consistency.
6. Freeze & Serve
- Transfer the churned ice cream to an airtight container.
- Freeze for at least 2 hours to firm up.
Once frozen to your liking, scoop and serve with your favorite toppings.
🍨 Storage Tip: Place a piece of parchment paper or plastic wrap directly on the surface before sealing to prevent ice crystals.
Optional Add-Ins and Toppings
While this coffee ice cream is incredible on its own, you can elevate it further with these delicious add-ins:
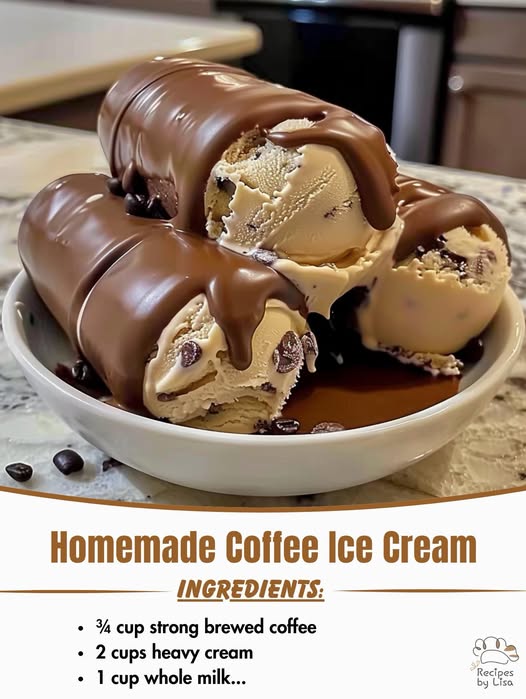
- Chocolate Chips or Shavings: Add in the last few minutes of churning.
- Caramel Swirl: Gently fold into the finished ice cream before freezing.
- Crushed Cookies: Oreos or biscotti pair beautifully with coffee flavors.
- Chopped Nuts: Toasted almonds or hazelnuts for extra crunch and richness.
- Sea Salt Sprinkle: For a gourmet finish that enhances the caramel notes of the coffee.
Let your creativity guide you!
Serving Suggestions
Looking for ways to impress guests or treat yourself like royalty? Try these serving ideas:
- Affogato-Inspired Sundae: Pour a shot of hot espresso over a scoop.
- Mocha Ice Cream Sandwiches: Layer between double chocolate cookies.
- Coffee Float: Add a scoop to a glass of cold brew or root beer.
- Dessert Martini: Blend a scoop with Baileys and vodka for a grown-up treat.
Storage and Shelf Life
Homemade ice cream is best enjoyed within 1–2 weeks of making. Although it remains safe to eat longer, the texture and flavor can degrade over time due to freezer burn.
Store it in a tightly sealed container and keep it at the back of the freezer where temperatures are most stable.
Tips for Success
Here are a few tips to guarantee a foolproof, five-star result every time:
- Use Fresh Ingredients: Especially the dairy and eggs. Fresh cream makes a world of difference.
- Don’t Rush the Chill: The colder your base, the smoother the churn.
- Avoid Over-Churning: Once it hits soft-serve texture, stop. Over-churning can cause it to become buttery or icy.
- Invest in a Quality Ice Cream Maker: Even budget-friendly models can deliver great results if used correctly.
- Experiment & Have Fun: Add flavors, mix-ins, or toppings to make it your own.
Healthier Swaps (Optional)
If you’re looking to reduce calories or fat, here are a few alternatives:
- Replace whole milk with unsweetened almond or oat milk (but note the texture will be less rich).
- Reduce sugar by using a sugar substitute like monk fruit or stevia, adjusting to taste.
- Use fewer egg yolks or substitute with cornstarch (about 1 tablespoon) for thickening, though this changes the texture slightly.
These swaps won’t recreate the same indulgent result, but they’ll still make a satisfying dessert.
Frequently Asked Questions
Can I make this without an ice cream maker?
Yes! Freeze the chilled mixture in a shallow pan, stirring every 30 minutes until creamy (about 3-4 hours). The texture won’t be as smooth, but it’s a great no-machine alternative.
Can I use brewed coffee instead of instant?
It’s not recommended. Brewed coffee adds extra water, diluting the flavor and affecting the texture. Stick with instant coffee or espresso powder for the best results.
Can I use decaf?
Absolutely! Use decaffeinated instant coffee if you want to enjoy this treat in the evening without the buzz.
Final Thoughts
This Homemade Coffee Ice Cream is the perfect marriage of bold coffee flavor and creamy decadence. It’s easy to make, fun to customize, and guaranteed to impress. Whether you’re savoring it solo or sharing with friends and family, it’s a recipe you’ll come back to again and again.
So brew some excitement in your kitchen—grab your whisk, crank up your ice cream maker, and fall in love with your new favorite frozen treat. One scoop is never enough!

