Step 3: Combine Wet and Dry Ingredients
Once the peanut butter mixture is fully melted and smooth, pour it over the dry ingredients. Stir everything together until the cereal and oats are evenly coated in the chocolatey mixture. The consistency should be slightly sticky, which will help everything bind together when it chills.
Step 4: Press the Mixture Into a Pan
Line an 8×8-inch baking pan with parchment paper for easy removal later. Pour the mixture into the pan and use a spoon or your hands to press it down firmly. You want the mixture to be packed tightly so that it holds its shape once chilled.
Step 5: Chill and Set
Pop the pan into the fridge and let the bars chill for at least one hour. This gives the mixture time to firm up and set into the perfect, sliceable consistency. The waiting game is the hardest part, but trust us, it’s worth it!
Step 6: Slice and Enjoy!
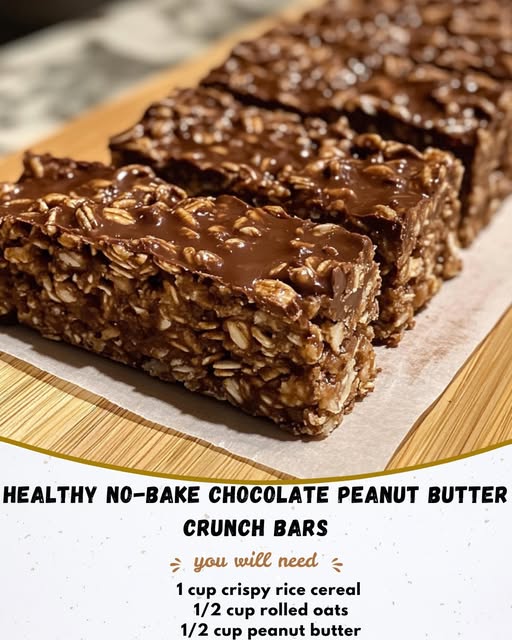
Once the bars are set, remove them from the fridge and carefully lift the mixture out of the pan using the parchment paper. Slice it into squares or rectangles, depending on how large or small you want your bars. Enjoy right away or store in an airtight container for later.
Tips for Making the Best Healthy No-Bake Chocolate Peanut Butter Crunch Bars
While this recipe is easy to follow, here are a few extra tips to make sure your bars turn out perfectly every time:
- Use natural peanut butter: Opt for peanut butter that doesn’t contain added sugars or hydrogenated oils. You want it to be as natural as possible, which will also enhance the overall flavor.
- Substitute ingredients: If you’re looking for a nut-free version, you can swap the peanut butter for almond butter or sunflower seed butter. Both will give the bars a slightly different flavor but still taste amazing!
- Play with add-ins: Want to get creative? You can mix in things like mini chocolate chips, chopped nuts, dried fruit, or even a sprinkle of sea salt on top for that sweet-salty combo.
- For a firmer texture: If you like your bars extra firm, simply let them chill for a little longer—up to 2 hours in the fridge should do the trick.
- Cutting tips: For cleaner slices, use a sharp knife and cut through the bars while they’re still cold. This will give you nice, even squares without any mess.
Health Benefits of These No-Bake Bars
These Healthy No-Bake Chocolate Peanut Butter Crunch Bars are more than just a sweet treat; they also offer several health benefits, making them a guilt-free indulgence. Here’s why you can feel good about enjoying them:
- Peanut Butter: A great source of protein, healthy fats, and fiber, peanut butter can help keep you feeling full longer. It also contains heart-healthy monounsaturated fats and a variety of vitamins and minerals like magnesium and vitamin E.
- Crispy Rice Cereal: This is low in calories but adds a satisfying crunch to the bars, making it a perfect texture contrast to the creamy peanut butter and smooth chocolate.
- Rolled Oats: Oats are rich in fiber, particularly beta-glucan, which can help lower cholesterol levels and improve heart health. They also provide long-lasting energy, making these bars a great pre- or post-workout snack.
- Cocoa Powder: Not only does cocoa powder add that rich chocolate flavor, but it’s also packed with antioxidants. The flavonoids found in cocoa can help improve heart health, reduce inflammation, and boost brain function.
- Honey or Maple Syrup: These natural sweeteners provide a healthier alternative to refined sugars, offering some additional nutrients and a more balanced glycemic index.
How to Store These No-Bake Bars
Once you’ve made a batch of these delicious bars, you’ll want to make sure they stay fresh for as long as possible. Here’s how to store them:
- In the fridge: Store the bars in an airtight container in the refrigerator for up to one week. They’ll remain firm and tasty, ready for when you need a quick snack.
- In the freezer: For longer storage, you can freeze the bars for up to 2-3 months. Simply wrap each bar individually in wax paper or plastic wrap, then place them in a zip-top bag. Let them thaw for a few minutes at room temperature before enjoying!
Final Thoughts: Why You Should Try These Healthy No-Bake Chocolate Peanut Butter Crunch Bars
In today’s fast-paced world, we all need quick, nutritious, and satisfying snacks to keep us energized throughout the day. These Healthy No-Bake Chocolate Peanut Butter Crunch Bars are the perfect solution for busy days, helping to satisfy your sweet tooth while nourishing your body. With the perfect balance of crunchy, creamy, and chocolatey goodness, they’re sure to become a staple in your recipe rotation.
Whether you’re treating yourself after a long day, sharing with family and friends, or packing them in your kids’ lunchboxes, these bars are sure to be a hit. Best of all, they’re easy to make, customizable, and far healthier than store-bought alternatives.
So why not give them a try today? Your taste buds—and your body—will thank you!

